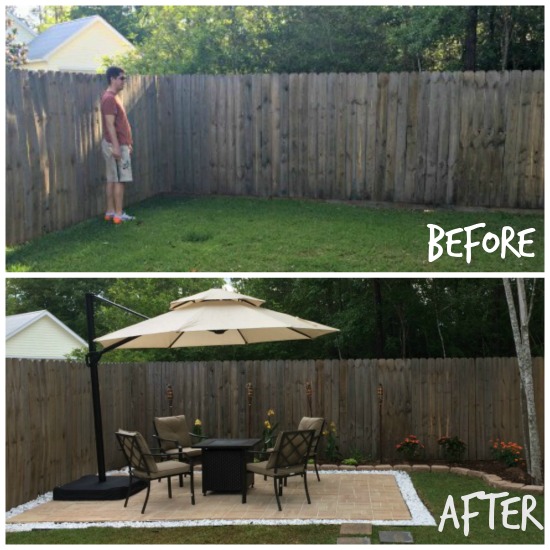
Paver Installation DIY: A Comprehensive Guide to Creating a Stunning Patio or Walkway
Transforming your outdoor space into an inviting oasis can be a rewarding endeavor. Installing pavers is a popular DIY project that adds both beauty and functionality to your yard. Whether you’re creating a new patio, walkway, or driveway, this comprehensive guide will provide you with step-by-step instructions and essential tips to ensure a successful installation.
Planning and Preparation
1. Determine the Scope of Your Project
Measure the area where you plan to install pavers and calculate the quantity of materials needed. Consider the size and shape of your pavers, as well as the desired layout.
2. Choose the Right Pavers
Select pavers that are durable, weather-resistant, and aesthetically pleasing. Concrete, brick, and natural stone are popular options with varying textures, colors, and patterns.
3. Gather Your Tools and Materials
Essential tools include a level, tamper, rubber mallet, edger, and broom. You will also need pavers, sand, gravel, geotextile fabric, and jointing material.
Site Preparation
4. Excavate the Area
Remove sod or existing vegetation and excavate the area to a depth of 6-8 inches. Ensure the excavation is level and slopes slightly away from your home to prevent water accumulation.
5. Install Geotextile Fabric
Lay down a layer of geotextile fabric to prevent weeds and stabilize the soil. Secure it with stakes or landscape pins.
6. Spread Gravel Base
Fill the excavation with 4-6 inches of compacted gravel. This layer provides drainage and support for the pavers.
Paver Installation
7. Create a Level Base
Use a level and tamper to create a smooth, level surface for the pavers. Add or remove gravel as needed to achieve the desired grade.
8. Lay the Pavers
Start laying the pavers from the edge of your project and work inward. Use a rubber mallet to gently tap the pavers into place, ensuring they are level and tight against each other.
9. Cut Pavers for Fit
Use a paver saw or angle grinder to cut pavers to fit around obstacles or create curves. Ensure the cuts are clean and precise.
Jointing and Finishing
10. Sweep Sand into the Joints
Once the pavers are in place, sweep fine sand into the joints. Use a broom to work the sand into the gaps between the pavers.
11. Compact the Sand
Use a plate compactor or hand tamper to compact the sand into the joints. This will secure the pavers and prevent them from shifting.
12. Apply Jointing Material
For added durability, apply a polymeric sand or mortar-based jointing material. This will further stabilize the pavers and prevent weeds from growing in the joints.
Maintenance and Care
13. Seal the Pavers (Optional)
To protect the pavers from stains and fading, apply a penetrating sealer. This will enhance their appearance and extend their lifespan.
14. Clean the Pavers Regularly
Use a pressure washer or broom to remove dirt and debris from the pavers. Avoid using harsh chemicals that can damage the surface.
15. Repair Cracked or Damaged Pavers
If a paver becomes cracked or damaged, remove it and replace it with a new one. Use a rubber mallet to tap the new paver into place and fill the joints with sand.
Troubleshooting
16. Pavers Sinking or Shifting
Ensure the base layer is properly compacted and the pavers are installed on a level surface.
17. Weed Growth in Joints
Apply a polymeric sand or mortar-based jointing material to prevent weeds from growing in the joints.
18. Stains or Discoloration
Use a penetrating sealer to protect the pavers from stains and fading. Clean spills immediately to prevent permanent damage.
Additional Tips
19. Create a Pattern
Use different sizes and colors of pavers to create unique patterns and designs.
20. Install Edging
Edging around the perimeter of your paver installation will prevent the pavers from shifting and create a clean, finished look.