Paver Installation Tools: A Comprehensive Guide
Pavers, the versatile and durable flooring option, require specialized tools for a seamless and professional installation. This comprehensive guide will delve into the essential tools, their functions, and tips for optimal use, empowering you to achieve a stunning paver surface.
Essential Tools for Paver Installation
1. Paver Edgers
Purpose: Cutting and shaping pavers to fit specific areas or create intricate designs.
Types:
- Manual Edgers: Handheld tools with a carbide blade that scores and breaks the paver.
- Electric Edgers: Power tools that provide precise and efficient cutting.
Tips:
- Use a sharp blade for clean cuts.
- Score the paver deeply before breaking it.
- Wear safety glasses and gloves for protection.
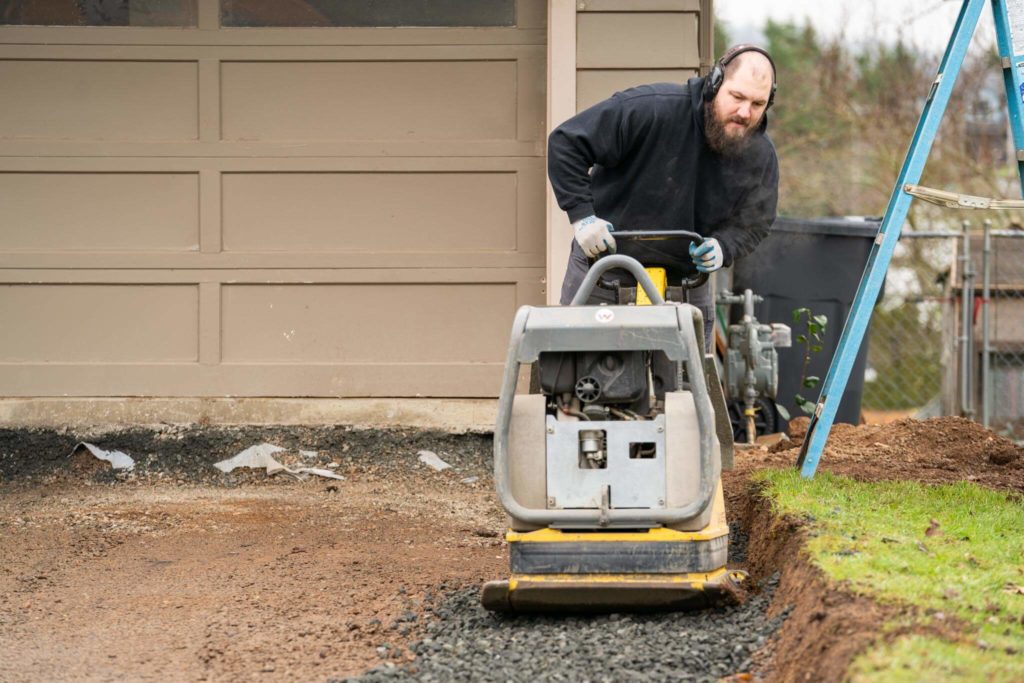
2. Paver Tampers
Purpose: Compacting the paver base and ensuring a level surface.
Types:
- Hand Tampers: Manual tools with a flat plate or rammer for compacting.
- Plate Compactors: Mechanical tools that vibrate and compact the base more efficiently.
Tips:
- Tamp the base thoroughly to create a solid foundation.
- Use a level to ensure the surface is even.
- Tamp the pavers after installation to secure them.
3. Paver Levellers
Purpose: Maintaining uniform spacing and height between pavers.
Types:
- T-Bar Levellers: T-shaped tools that align and level pavers during installation.
- Clip-On Levellers: Clips that attach to pavers and automatically adjust their height.
Tips:
- Use levellers consistently to achieve a professional-looking finish.
- Remove levellers after the paver adhesive has set.
- Clean levellers thoroughly for reuse.
4. Paver Cutters
Purpose: Cutting pavers into specific shapes or sizes.
Types:
- Wet Saws: Power tools that use water to cool the blade and minimize dust.
- Angle Grinders: Handheld tools with a rotating abrasive disc for cutting and shaping.
Tips:
- Wear earplugs and a dust mask for protection.
- Use a sharp blade for clean cuts.
- Secure the paver firmly before cutting.
5. Paver Sealers
Purpose: Protecting pavers from moisture, stains, and wear.
Types:
- Penetrating Sealers: Soak into the pavers and create a barrier against water and stains.
- Topical Sealers: Form a protective layer on the paver surface.
Tips:
- Clean the pavers thoroughly before sealing.
- Apply the sealer according to the manufacturer’s instructions.
- Allow the sealer to cure completely before using the surface.
Specialized Tools for Advanced Installations
6. Paver Lifters
Purpose: Lifting and moving pavers without damaging them.
Types:
- Suction Lifters: Vacuum-based tools that attach to the paver surface.
- Forklift Attachments: Specialized forks that can lift and transport large quantities of pavers.
Tips:
- Ensure the suction lifters are clean and free of debris.
- Use caution when lifting heavy pavers.
- Wear gloves for protection.
7. Paver Joint Fillers
Purpose: Filling the joints between pavers to prevent weeds and stabilize the surface.
Types:
- Sand: A traditional and affordable joint filler that can be swept into the joints.
- Polymeric Sand: A more durable and flexible joint filler that hardens and locks into place.
Tips:
- Choose a joint filler that matches the paver color and style.
- Fill the joints completely to prevent weeds.
- Sweep away excess joint filler after installation.
8. Paver Compressors
Purpose: Compressing the paver base and creating a smooth surface.
Types:
- Walk-Behind Compressors: Manual tools that are pushed over the paver base.
- Ride-On Compressors: Mechanical tools that can compact large areas quickly and efficiently.
Tips:
- Use a compressor with sufficient weight to effectively compact the base.
- Compact the base in multiple passes for optimal results.
- Wear earplugs and a dust mask for protection.
9. Paver Cleaners
Purpose: Removing dirt, stains, and efflorescence from pavers.
Types:
- Pressure Washers: Power tools that use high-pressure water to clean pavers.
- Chemical Cleaners: Specialized cleaning solutions that dissolve stains and dirt.
Tips:
- Test the cleaner on an inconspicuous area before using it on the entire surface.
- Use a soft brush or sponge to avoid scratching the pavers.
- Rinse the pavers thoroughly after cleaning.
10. Paver Grinders
Purpose: Smoothing rough edges, removing excess adhesive, and creating a polished finish.
Types:
- Angle Grinders: Handheld tools with a rotating abrasive disc for grinding and shaping.
- Floor Grinders: Larger, mechanical tools that can grind large areas efficiently.
Tips:
- Use a diamond-tipped grinding disc for optimal results.
- Wear a dust mask and eye protection.
- Grind in small sections to avoid overheating the pavers.
Tips for Optimal Tool Use
- Read the manufacturer’s instructions: Carefully follow the instructions for each tool to ensure proper use and safety.
- Use the right tools for the job: Select the appropriate tools based on the specific paver installation requirements.
- Maintain your tools: Regularly clean and sharpen your tools to ensure optimal performance.
- Wear appropriate safety gear: Always wear gloves, safety glasses, and earplugs when using paver installation tools.
- Practice on scrap pavers: Experiment with the tools on scrap pavers before using them on the actual installation surface.
- Take your time: Paver installation requires precision and attention to detail. Don’t rush the process to avoid mistakes.
- Seek professional help if needed: If you encounter any difficulties during the installation process, don’t hesitate to consult with a professional paver installer.