Paver Installation Techniques: A Comprehensive Guide
Introduction
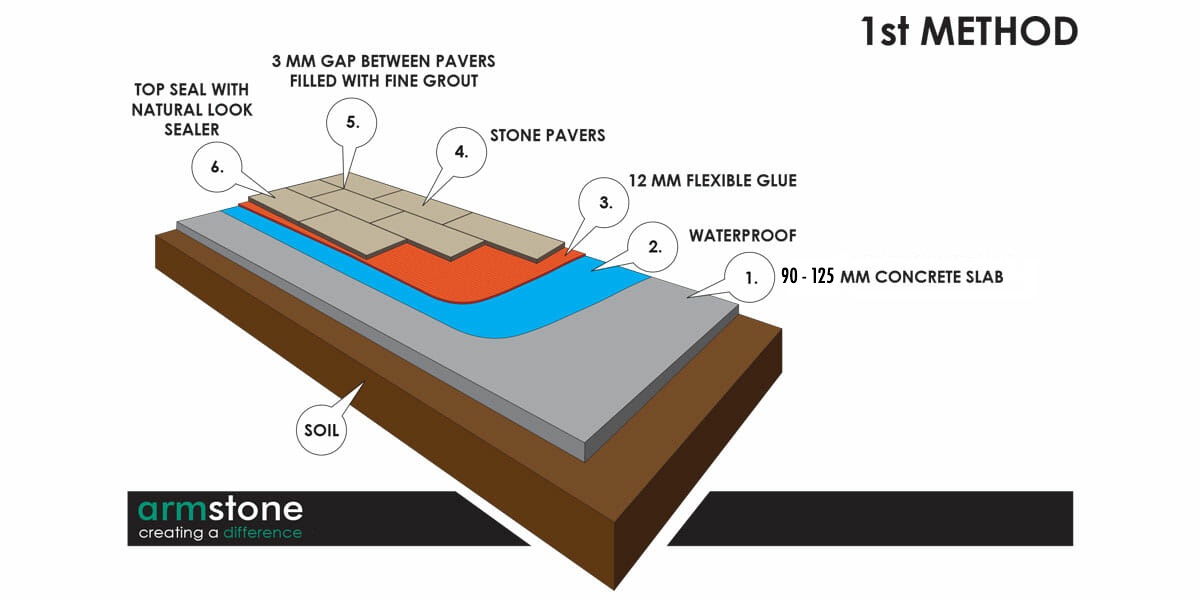
Pavers, versatile and durable materials, have become increasingly popular for patios, driveways, walkways, and other outdoor surfaces. Installing pavers requires precision and attention to detail to ensure a long-lasting and aesthetically pleasing result. This guide will provide a comprehensive overview of the various paver installation techniques, covering everything from site preparation to finishing touches.
Site Preparation
1. Soil Excavation
- Determine the desired depth of the paver installation, typically 4-6 inches.
- Excavate the soil to the specified depth, ensuring a level and compacted base.
- Compact the soil using a plate compactor or hand tamper.
2. Base Installation
- Install a base layer of crushed gravel or crushed stone over the compacted soil.
- The base layer should be 2-4 inches thick and well-compacted.
- Use a screed or level to ensure a uniform surface.
3. Edging
- Install edging around the perimeter of the paver area to prevent pavers from shifting.
- Edging can be made of concrete, plastic, or metal.
- Secure the edging firmly into the ground.
Paver Installation
1. Setting the Pavers
- Start laying the pavers from the center outward, working towards the edges.
- Use a rubber mallet or paver tamper to gently tap the pavers into place.
- Maintain a consistent spacing between pavers, typically 1/4 to 1/2 inch.
2. Leveling and Compacting
- Use a level to check the pavers for evenness.
- Compact the pavers using a plate compactor or hand tamper.
- Repeat the leveling and compacting process until the pavers are firmly seated.
3. Cutting and Fitting
- Cut pavers to fit around obstacles or to create custom shapes.
- Use a wet saw or diamond blade cutter for clean and precise cuts.
- Fit the cut pavers into place and secure them with adhesive or mortar.
Sanding and Sealing
1. Sanding
- Apply fine-grained sand over the pavers and sweep it into the joints.
- Use a broom or power blower to remove excess sand.
- Sanding helps stabilize the pavers and prevents weeds from growing.
2. Sealing
- Apply a paver sealant to protect the pavers from stains, fading, and erosion.
- Choose a sealant that is compatible with the type of pavers used.
- Follow the manufacturer’s instructions for application.
Pattern and Design
1. Running Bond
- A classic pattern where pavers are laid in straight rows, alternating between headers and stretchers.
2. Herringbone
- A geometric pattern where pavers are laid at a 45-degree angle, creating a zig-zag effect.
3. Basket Weave
- A complex pattern where pavers are laid in alternating rows of headers and stretchers, creating a woven effect.
4. Circular
- A pattern where pavers are laid in a circular shape, often used for patios or driveways.
5. Custom Designs
- Create unique and personalized designs by combining different patterns or using pavers of various colors and shapes.
Maintenance and Repair
1. Regular Cleaning
- Sweep or power wash pavers regularly to remove dirt and debris.
- Use a mild detergent and water for deeper cleaning.
2. Joint Maintenance
- Inspect paver joints periodically and refill with sand as needed.
- Seal the joints every few years to prevent weeds and erosion.
3. Paver Repair
- Replace cracked or damaged pavers as soon as possible.
- Use a rubber mallet or paver tamper to reset loose pavers.
- Contact a professional for major repairs or replacements.
Conclusion
Installing pavers is a rewarding project that can enhance the aesthetic appeal and functionality of your outdoor space. By following the techniques outlined in this guide, you can ensure a durable and visually stunning paver installation that will last for years to come. Remember to pay attention to site preparation, paver installation, sanding, sealing, and ongoing maintenance to keep your pavers looking their best.